Converting a shed into a tiny home isn’t just trendy, it’s practical. A quality shed delivers four walls, a roof, and a solid foundation for about a third of what traditional construction costs. But turning that garden structure into livable square footage takes more than adding a futon and calling it done. This guide walks through the structural, legal, and design considerations needed to transform a basic shed into a code-compliant, comfortable tiny dwelling, whether it’s a backyard guest suite, off-grid retreat, or full-time residence.
Table of Contents
ToggleKey Takeaways
- Converting sheds into tiny homes costs one-third of traditional construction, delivering livable space for $13,400–$33,200 depending on finishes and utilities.
- Check local zoning laws, building codes, and HOA restrictions before purchasing a shed, as reclassifying it as an accessory dwelling unit (ADU) may trigger different permitting requirements.
- Critical structural upgrades include insulation (R-13 to R-15 in walls, R-30 to R-38 in roof), egress windows meeting IRC code, and electrical work to NEC standards to ensure safety and resale value.
- Smart interior design for sheds to tiny homes prioritizes wet-core placement, sleeping lofts above kitchens or bathrooms, and wall-mounted fixtures to maximize floor space in compact layouts.
- Off-grid options like solar arrays ($5,000–$10,000), rainwater catchment, and composting toilets enable full independence but require upfront investment and local health code compliance.
- DIY labor on finishes, salvaged materials, and pre-ordered shed upgrades can reduce overall project costs by $5,000–$10,000 while maintaining quality and code compliance.
Why Sheds Make Perfect Tiny Home Foundations
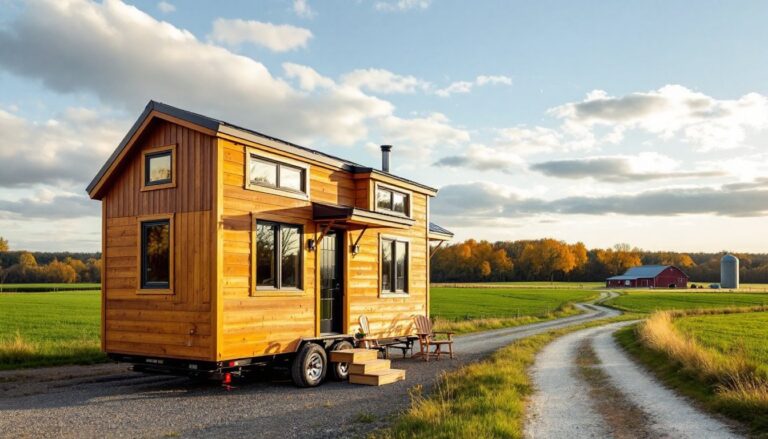
Pre-built sheds offer speed and cost advantages over stick-built construction. Most manufacturers deliver a weathertight shell in hours, not weeks. Standard sizes, typically 8×12, 10×16, or 12×20 feet, provide 96 to 240 square feet of enclosed space, enough for a studio layout with kitchen, bath, and sleeping loft.
The framing is already done. Quality shed builders use 2×4 studs on 16-inch or 24-inch centers, the same as residential construction. Floor joists are commonly 2×6 or 2×8 treated lumber, rated for storage loads that exceed residential floor requirements (40 psf live load). Roof trusses come pre-engineered, leaving the buyer free to focus on finishes and utilities rather than structural carpentry.
Cost is the kicker. A bare-bones 10×16 utility shed runs $3,000–$6,000 delivered, while comparable square footage built from scratch easily hits $15,000–$20,000 in labor and materials. Even after upgrades, insulation, drywall, windows, electric, the all-in cost stays well below traditional builds. For DIYers comfortable with finish work, a shed conversion can pencil out at $15,000–$30,000 for a turnkey tiny home, depending on finishes and whether utilities are on-grid or off-grid.
Essential Planning Steps Before Converting Your Shed
Don’t buy the shed until the paperwork is sorted. Local zoning and building codes dictate what’s legal, and ignoring them creates expensive problems later.
Start with a site plan. Measure setbacks from property lines, easements, and existing structures. Most jurisdictions require 5–10 feet from side and rear property lines for accessory structures, though setbacks increase if the structure is classified as a dwelling.
Check maximum allowable square footage for accessory buildings. Many municipalities cap outbuildings at 120–200 square feet without special permits. Converting a shed to living space often reclassifies it as an accessory dwelling unit (ADU), which may trigger different rules, minimum square footage, ceiling height (usually 7 feet minimum), egress windows, and septic/sewer connections.
Zoning Laws and Building Permits
Zoning determines if a tiny home is allowed: building permits ensure how it’s built. Call the local planning or building department before ordering materials. Ask specifically about:
- ADU allowances: Some cities encourage ADUs for housing density: others ban them outright.
- Minimum dwelling size: A few areas mandate at least 300–400 square feet for habitable structures.
- Utility hookups: Jurisdictions may require connection to municipal water and sewer, ruling out composting toilets or greywater systems.
- Inspections: Electrical, plumbing, framing, and insulation often need sign-off before walls close up.
If the property is in an HOA, read the covenants. Many restrict outbuildings or require architectural approval. Variance requests take time and money, sometimes thousands of dollars in fees and engineering reports. For those serious about luxury tiny homes, early legal clarity prevents costly surprises.
Key Structural Upgrades for Livable Shed Tiny Homes
Most utility sheds aren’t built to residential code out of the box. Upgrading the bones ensures safety, comfort, and resale value.
Insulation is non-negotiable. Standard sheds use uninsulated walls and roofs. Install R-13 to R-15 fiberglass batts or rigid foam in wall cavities and R-30 to R-38 in the roof/ceiling. Spray foam works well in tight spaces and seals air leaks, but costs more, budget $1–$2 per board foot.
Windows and doors need upgrading for egress and energy efficiency. IRC (International Residential Code) requires at least one egress window per sleeping area: minimum 5.7 square feet of openable area, with no dimension less than 20 inches, and a sill height no more than 44 inches above the floor. Replacing shed windows with residential double-pane, low-E units cuts heat loss and meets code. Budget $150–$400 per window installed.
Electrical must be done to NEC (National Electrical Code) standards. Run 14/2 or 12/2 Romex through studs, use junction boxes for all connections, and install GFCI outlets in kitchen and bath areas. A basic 100-amp subpanel fed from the main house costs $300–$600 in materials. Hire a licensed electrician if unfamiliar with load calculations and grounding, incorrect wiring is a fire and safety hazard.
Plumbing depends on use. A wet bath with shower, toilet, and sink requires 1/2-inch PEX supply lines and 3-inch ABS or PVC drain/waste/vent (DWV) piping. Vent stacks must terminate above the roofline and tie into the main sewer or septic. For off-grid setups, composting toilets eliminate blackwater, and greywater systems handle sinks and showers. Check local health codes, some areas prohibit greywater discharge. Those looking at fire safety tiny home considerations should also install smoke and CO detectors per code.
Designing Your Shed Tiny Home Interior for Maximum Comfort
Smart layout makes or breaks a tiny space. Start with the wet core, bathroom and kitchen, and build the floor plan around plumbing runs.
Place the bathroom in one corner to minimize drain line length. A 3×5-foot or 3×6-foot wet bath fits a standard shower pan (32×32 inches or 36×36 inches), toilet, and corner sink. Use a sliding barn door or pocket door to save swing clearance. Wall-mount the sink and toilet if possible to ease floor cleaning and create visual space.
Kitchens can be galley-style along one wall or L-shaped. 24-inch-deep base cabinets and a 24- or 30-inch range keep the footprint tight. Apartment-size appliances work well: 18- or 20-inch dishwashers, 10–12 cubic foot refrigerators, and two-burner induction cooktops. Overhead cabinets to the ceiling (standard 8 feet) maximize storage without crowding counters. For ideas on compact layouts, Apartment Therapy features dozens of small-space kitchen tours.
Sleeping lofts reclaim floor space. Build the loft over the bathroom or kitchen, with a ceiling height of 3.5–4 feet, enough to sit up but not stand. Use 2×6 or 2×8 joists at 16-inch centers, rated for 50 psf live load (code allows 30 psf for sleeping areas, but overbuild for stiffness). Access via a ladder, ship’s ladder, or alternating-tread stair, depending on available floor area. Curbed has covered several high-end shed conversions with creative loft designs.
Flooring should be durable and moisture-resistant. Luxury vinyl plank (LVP) installs easily over plywood subfloor, resists water, and costs $2–$5 per square foot. Engineered hardwood adds warmth but requires climate control to prevent warping. In bathrooms, use ceramic or porcelain tile for longevity.
Utilities and Off-Grid Options for Shed Conversions
Grid-tied utilities are simpler but limit portability. Off-grid systems add complexity and upfront cost but enable true independence.
Electrical (On-Grid): Run underground conduit from the main panel to the shed. Use UF-B (underground feeder) cable rated for direct burial or pull THWN wire through Schedule 40 PVC conduit. Bury at least 18 inches deep (or per local code). A 50-amp subpanel handles lights, outlets, mini-split heat pump, and kitchen appliances. Permit and inspection required.
Electrical (Off-Grid): A 1,500–2,000-watt solar array with 400–600 amp-hours of lithium battery storage powers LED lighting, laptop, mini-fridge, and small appliances. Expect $5,000–$10,000 for components and installation. For reliable performance, read up on tiny house solar panels before choosing equipment. A propane generator provides backup during extended cloudy periods.
Water (On-Grid): Trench a supply line from the main house using 3/4-inch PEX below the frost line (varies by climate: typically 24–48 inches in northern zones). Install a shutoff valve inside the shed and drain the line in winter if unheated.
Water (Off-Grid): A rainwater catchment system with gutters, first-flush diverter, and food-grade storage tanks (250–500 gallons) supplies non-potable water. Filter and UV-treat for drinking. Hauling water in 5-gallon jugs works short-term but becomes tedious.
HVAC: A mini-split heat pump (9,000–12,000 BTU) heats and cools efficiently and mounts on an exterior wall. Prices start around $700–$1,200 for DIY units. Alternatively, a vented propane heater and window AC keep costs under $500 but sacrifice efficiency. Install a bathroom exhaust fan (80–100 CFM) and a range hood to manage moisture and odors.
Budgeting Your Shed to Tiny Home Project
Total cost depends on finish level, DIY labor, and whether the project is inspected and permitted. Here’s a realistic breakdown for a 10×16-foot (160 sq ft) conversion:
- Shed shell (delivered): $4,000–$7,000
- Insulation (walls, roof, floor): $600–$1,200
- Windows and exterior door: $800–$1,500
- Electrical (subpanel, wiring, fixtures): $800–$2,000 (DIY) or $2,000–$4,000 (licensed electrician)
- Plumbing (fixtures, PEX, DWV piping): $1,000–$2,500
- Interior finishes (drywall, paint, trim, flooring): $1,500–$3,000
- Kitchen (cabinets, countertop, appliances, sink): $2,000–$5,000
- Bathroom (shower, toilet, vanity, tile): $1,500–$3,500
- HVAC (mini-split or space heater): $700–$1,500
- Permits and inspections: $500–$2,000 (varies widely)
Total estimated cost: $13,400–$33,200
Doing finish carpentry, drywall, painting, and flooring yourself can cut $4,000–$8,000 from the budget. Salvaged materials, Craigslist cabinets, used appliances, reclaimed trim, shave another $1,000–$2,000. For those pursuing ideas like a tiny home office setup or a school bus tiny home aesthetic, finish choices heavily influence final cost.
Pro tip: Order the shed with upgraded features if offered, thicker floor joists, better siding, or a steeper roof pitch, rather than retrofitting later. Manufacturers upcharge less than field modifications cost. For project tutorials and material tips, check The Handyman’s Daughter for beginner-friendly carpentry and finish work guides.
Budget 10–20% contingency for surprises: hidden rot in the subfloor, code upgrades mid-project, or tools you didn’t own. Track expenses in a spreadsheet to avoid scope creep.
A shed-to-tiny-home conversion delivers functional living space for a fraction of new construction costs, but only if zoning, structural upgrades, and finishes are handled correctly. Measure twice, permit once, and don’t skip the prep work.